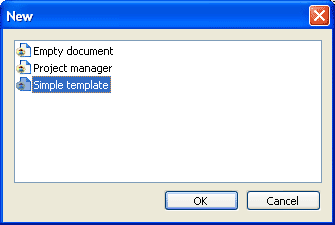
After successful installation of DevPlanner you are able to start it from menu Start->Programs. Press Continue on the splash screen and select appropriate document template.
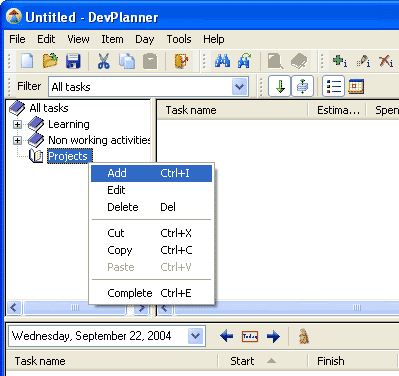
Examine hierarchy of categories on the left panel. Expand category Projects and add your project there by clicking Add command in context menu for this item. In new category dialog edit name and optionally description.
Right click mouse on tasks list pane, in the rightmost area. Select Add to add your first task to your project.
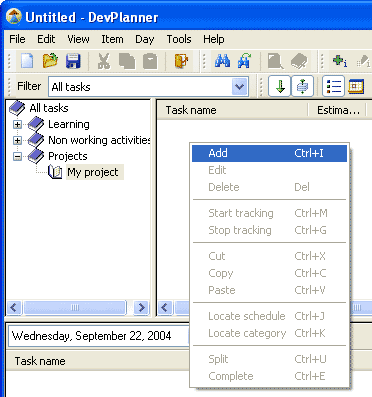
Type a name for your task, estimate it in hours, set priority for this task, probably description and click OK. Repeat it again to add few more tasks.
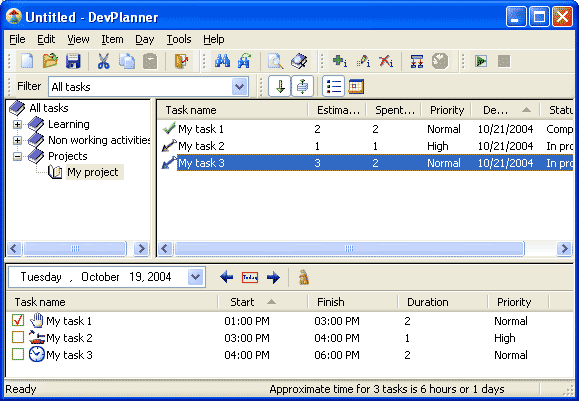
Now you are able to plan it and do. Drag a task to the bottom area named plan entries list. In the plan entry dialog type a time you intending to start working on this task and approximate duration in hours or finishing time. Plan another tasks using same approach. Click check box near the planned task to mark this task as completed.
Save this document. Try to play with available reports using command Tools->Reports.
See also
Working with a task | Planning a day | Working with a category